PagerDuty + Coalesce Quality integration benefits
Connecting PagerDuty with Coalesce Quality enhances your incident management and alerting capabilities, ensuring data issues are handled swiftly. Key benefits:- Instant Alerts: Get real-time notifications from PagerDuty when a data issue arises.
- Quick Impact Assessment: Easily evaluate the downstream business impact of data issues (e.g., impacted data products) so your team can prioritize fixes.
- Unified workflow: On-call responders are alerted immediately, enabling faster, more efficient resolutions that fit your existing workflows.
How it Works
- Issues triggered by monitors or transformation layer tests (from dbt, SQLMesh, or Coalesce Transform) are sent to PagerDuty as alerts, including details about the downstream impact, an error message, and the activity log
Requirements
- PagerDuty integrations require an Admin base role for account authorization. If you do not have this role, please contact an Admin or Account Owner within your organization to configure the integration.
Support
If you need help with this integration, please reach out in our shared Slack channel.Integration Walkthrough
In PagerDuty
- There are two ways to integrate with PagerDuty: via Global Event Routing or on a PagerDuty Service. If you are adding this integration to an existing PagerDuty service, please skip to the Integrating with a PagerDuty Service section of this guide.
Integrating With Global Event Routing
Integrating with Global Event Routing enables you to route events to specific services based on the payload of the event from your tool. If you would like to learn more, please visit our article on Global Event Routing.- From the Configuration menu, select Event Rules.
- On the Event Rules screen, click on the arrow next to Incoming Event Source to display the Integration key information. Copy your Integration Key. This is the same integration key you will use for any other tool you want to integrate with using event rules. When you have finished setting up the integration in your tool, you will return to this interface to specify how to route events from your tool to services in PagerDuty.

Integrating With a PagerDuty Service
- From the Configuration menu, select Services.
- There are two ways to add an integration to a service:
- If you are adding your integration to an existing service: Click the name of the service you want to add the integration to. Then, select the Integrations tab and click the New Integration button.
- If you are creating a new service for your integration: Please read our documentation in section Configuring Services and Integrations and follow the steps outlined in the Create a New Service section, selecting Coalesce Quality as the Integration Type in step 4. Continue with the “In Coalesce Quality” section below once you have finished these steps.
- Enter an Integration Name in the format
monitoring-tool-service-name(e.g.,coalesce-quality-warehouse-one-monitoring) and select Coalesce Quality from the Integration Type menu. - Click the Add Integration button to save your new integration. You will be redirected to the Integrations tab for your service.
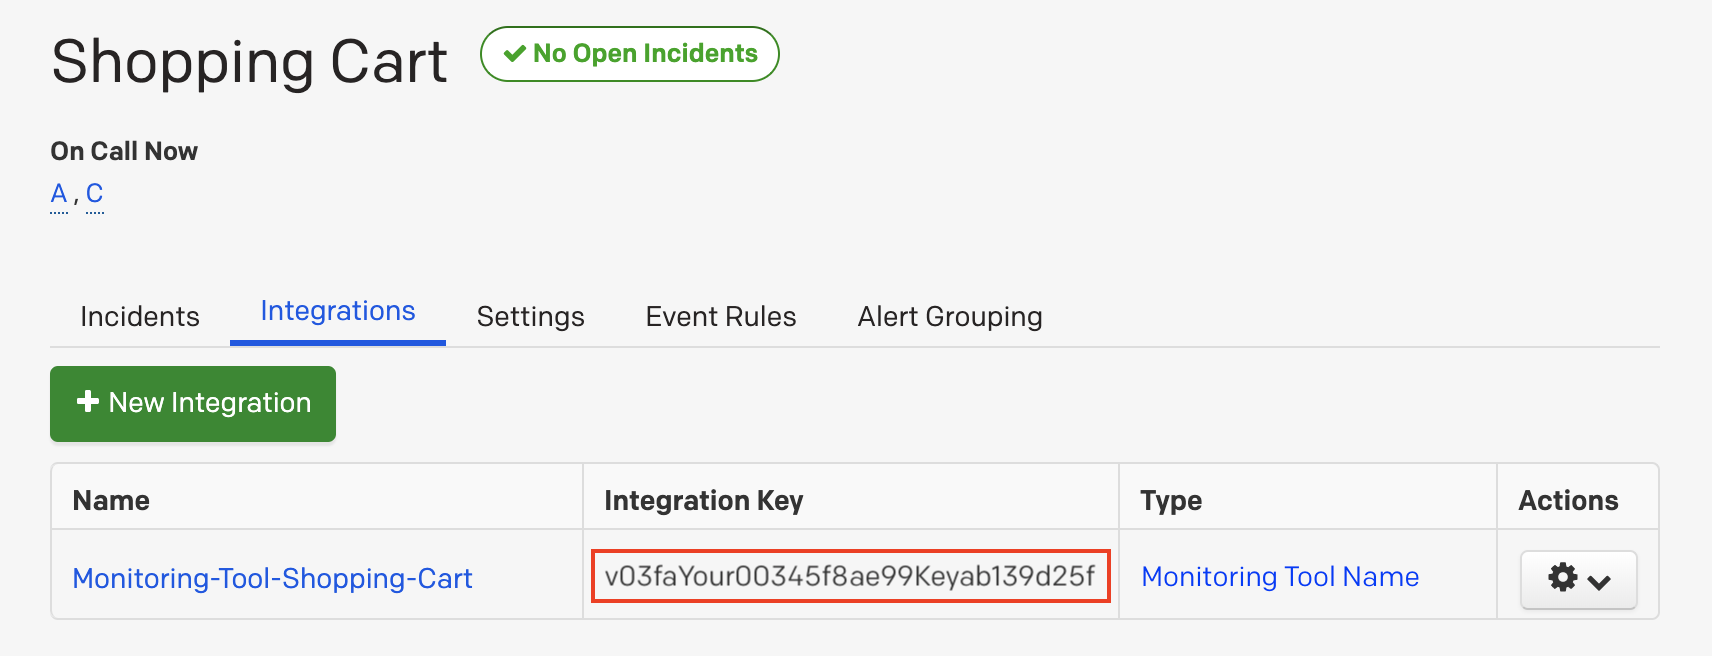
- An Integration Key will be generated on this screen. Keep this key saved in a safe place, as it will be used when you configure the integration in the next section.
In Coalesce Quality
- Head to the Settings tab
- Click Add integration
- Select PagerDuty Manual
- Enter the following
- Integration name: The name of your integration (default is PagerDuty)
- Sevice region: Select EU or US depending on your PagerDuty service
- Integration key: This is the Integration Key linked to your PagerDuty service integration. You can find it by opening the Integrations tab within your PagerDuty service. It’s a 32-character code.
- Click Create
- Under Settings you’ll see your new PagerDuty integration
Syncing the status between PagerDuty and Coalesce Quality
When taking action in PagerDuty, the following mappings apply:- Acknowledged: Sets the status to Investigating in Coalesce Quality
- Resolved: Sets the status to Fixed in Coalesce Quality
- Investigating: Sets the status to Acknowledged in PagerDuty
- Fixed/Expected/No Action Needed: Resolves the issue in PagerDuty
Configuring it in Coalesce Quality
- Ensure that the PagerDuty integration is working by navigating to settings
- To set up syncing, edit the PagerDuty integration and copy the Webhook URL. You’ll need this URL to configure the Webhook in PagerDuty. When creating a new PagerDuty integration, the Webhook URL will appear after on the integration page.
Configuring it in PagerDuty
Follow these steps to add a webhook for Coalesce Quality:- Go to Services, select the relevant service, and open the Integrations tab.
- Scroll to the bottom and click on the option to Add Webhooks to the service.
- Click New Webhook.
- Paste the Webhook URL you obtained earlier, and add a description (e.g.,
Coalesce Quality). - Ensure all event subscriptions are selected.
- Click Add Webhook at the bottom of the page.
- (Optional) After the Webhook Subscription is created, PagerDuty will provide a secret to verify webhook payloads. Copy this secret and configure it in the PagerDuty service integration settings to authenticate events received through the webhook.