This guide will show you how to securely connect Coalesce Quality to your Redshift cluster or Redshift Serverless workgroup.
We need this information so we collect metadata about your tables.To be able to finish this guide, you’ll need the following:
→ Access to modify your Redshift configuration as a superuser⏱️ Estimated time to finish: 10 minutes.
→ Access to modify your Redshift configuration as a superuser⏱️ Estimated time to finish: 10 minutes.
Data we collect
We read metadata from your Redshift database using the dedicated user described below. Depending on which features you enable in the integration, we ingest:- Catalog — databases, schemas, tables, views, late-binding views, materialized views, columns, comments, data types, constraints (informational primary / unique / foreign keys).
- SQL definitions — view definitions, materialized view definitions, stored procedure bodies, and UDF bodies. Used for lineage and to detect references between objects.
- Distribution and sort metadata —
DISTSTYLE,DISTKEY,SORTKEY(compound / interleaved / auto) per table. - Table metrics (opt-in) — row counts and last-modified timestamps for anomaly detection.
- Query logs (opt-in) —
SYS_QUERY_HISTORYfor performance, cost, and lineage signals. - Freshness from query logs (opt-in) —
SYS_QUERY_DETAILfor tables touched by recent writes. Requires thesys:monitorrole on Redshift Serverless. - External tables — Spectrum external schemas and tables, when present.
Metadata vs. data access. The baseline grants below give Coalesce Quality access to your schema and DDL, never to row data. With every opt-in disabled, the integration runs metadata-only queries against
SVV_* and pg_catalog views. Data-reading queries are issued only when you enable Fetch table metrics, Fetch query logs, Freshness from query logs, or run SQL test execution against the audit table.Setup Redshift access
Create a dedicated user with sufficient permissions
- Open the Query Editor in Redshift and make sure the right cluster / workgroup and database are selected.
-
Run the following SQL as a superuser to create a dedicated user and group with the necessary read-only permissions, where
<password>is a secret you define for the integration. -
Grant
USAGEon each schema you want monitored. This is required even for views that useWITH NO SCHEMA BINDING— both the schema in which the late-binding view is defined and any schemas it reads from needUSAGE.To grantUSAGEon every schema in the database: -
Grant the user visibility into stored procedures, UDFs, and materialized views in the schemas you want monitored. Without these grants, procedure / UDF metadata and materialized view definitions will not be collected.
-
(Optional) Grant access to table data within a schema. Required if you want Coalesce Quality to run monitors on your raw data — for example Custom SQL monitors:
Enable freshness monitoring (Redshift Serverless)
To estimate table freshness from query logs, the user needs access toSYS_QUERY_DETAIL. On Redshift Serverless this is gated behind the predefined sys:monitor role.
STV_* / STL_* views — see the official Redshift system table reference.
Whitelist the Coalesce Quality IP
For the complete list of IP addresses by region, see Coalesce Quality IP Whitelist.
-
From Redshift, navigate to
Workgroup configurationand click your default workgroup.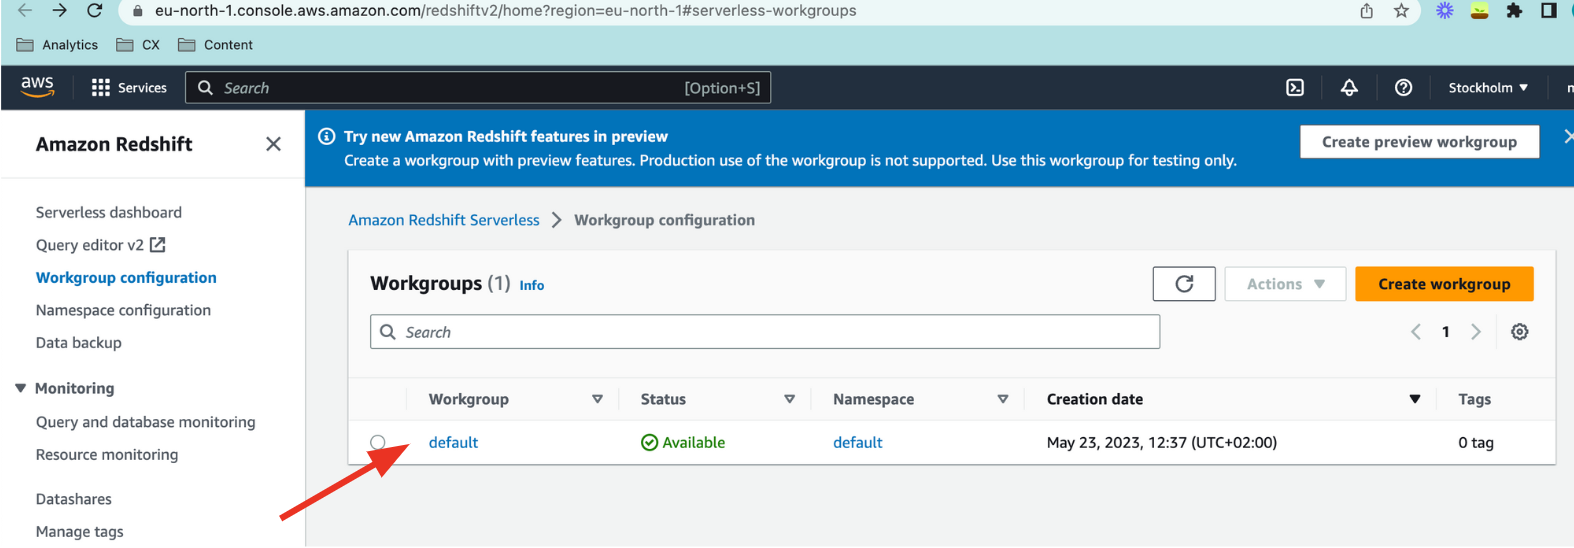
-
Under Network and security click
Editand check the Turn on Publicly accessible checkmark. Then clickSave changes.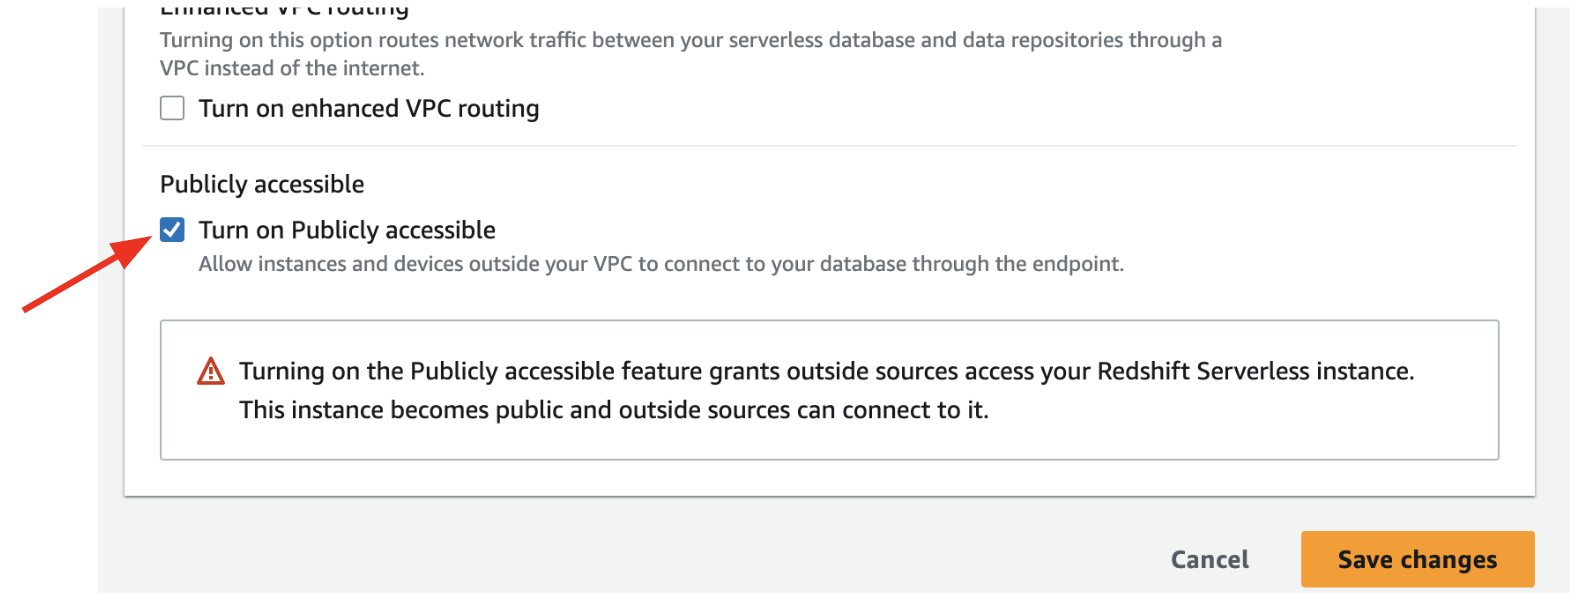
-
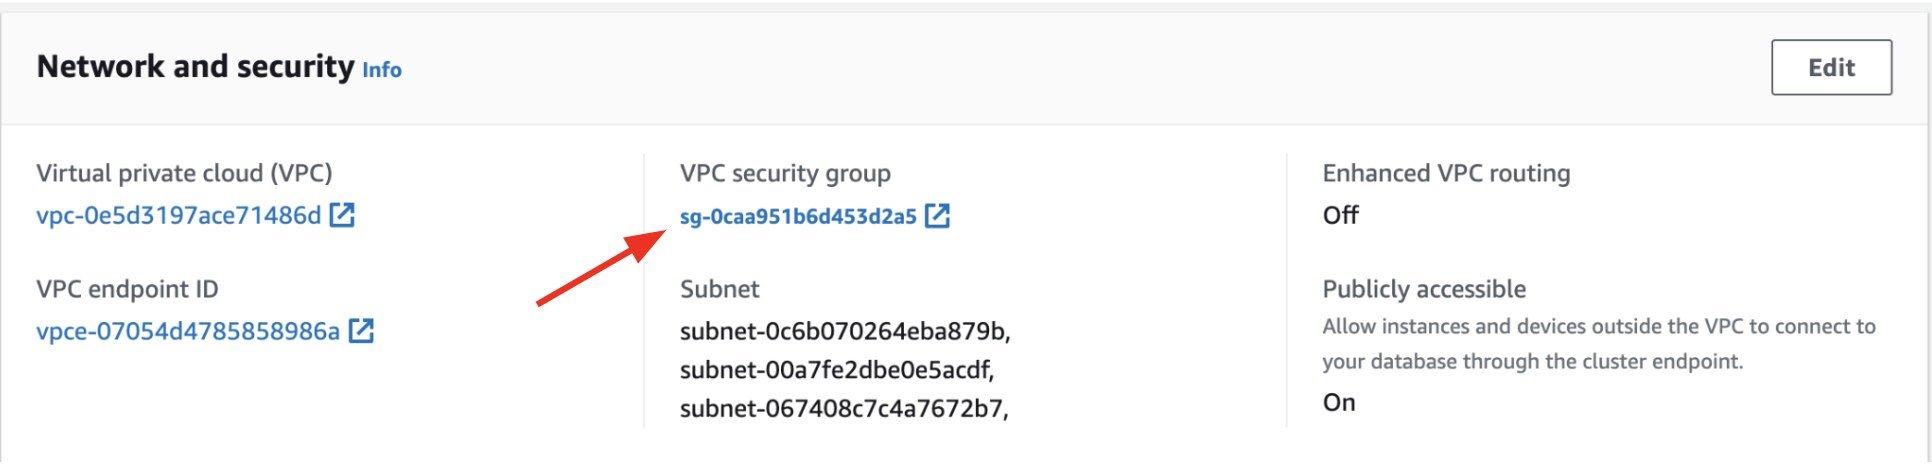
Close the window to return to the workgroup view and click your VPC security group.
-
Under the Inbound rules tab click
Edit inbound rules, thenAdd rule:
- Type:
Redshift(port 5439) - Source:
Customwith34.105.135.39(EU) or35.238.250.82(US)
- Type:
-
Click
Save rules.
Database, dataset and host name
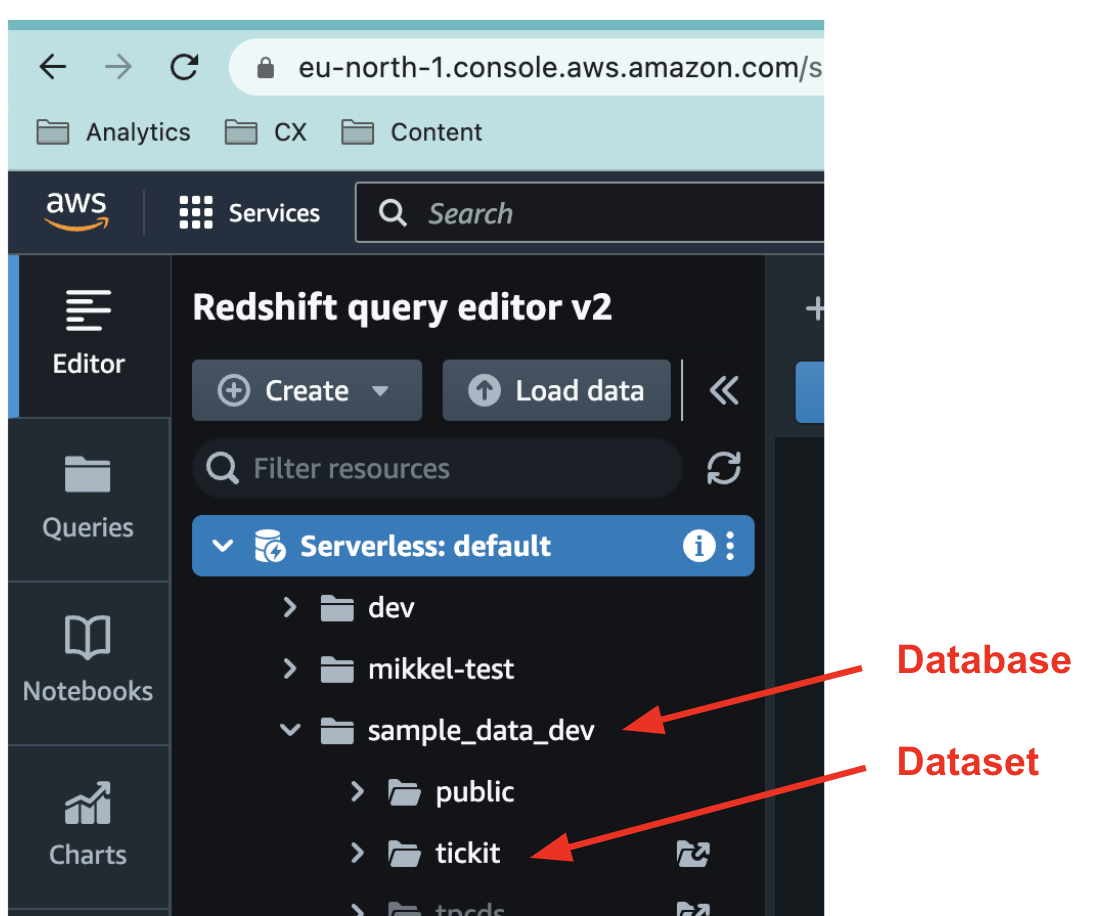
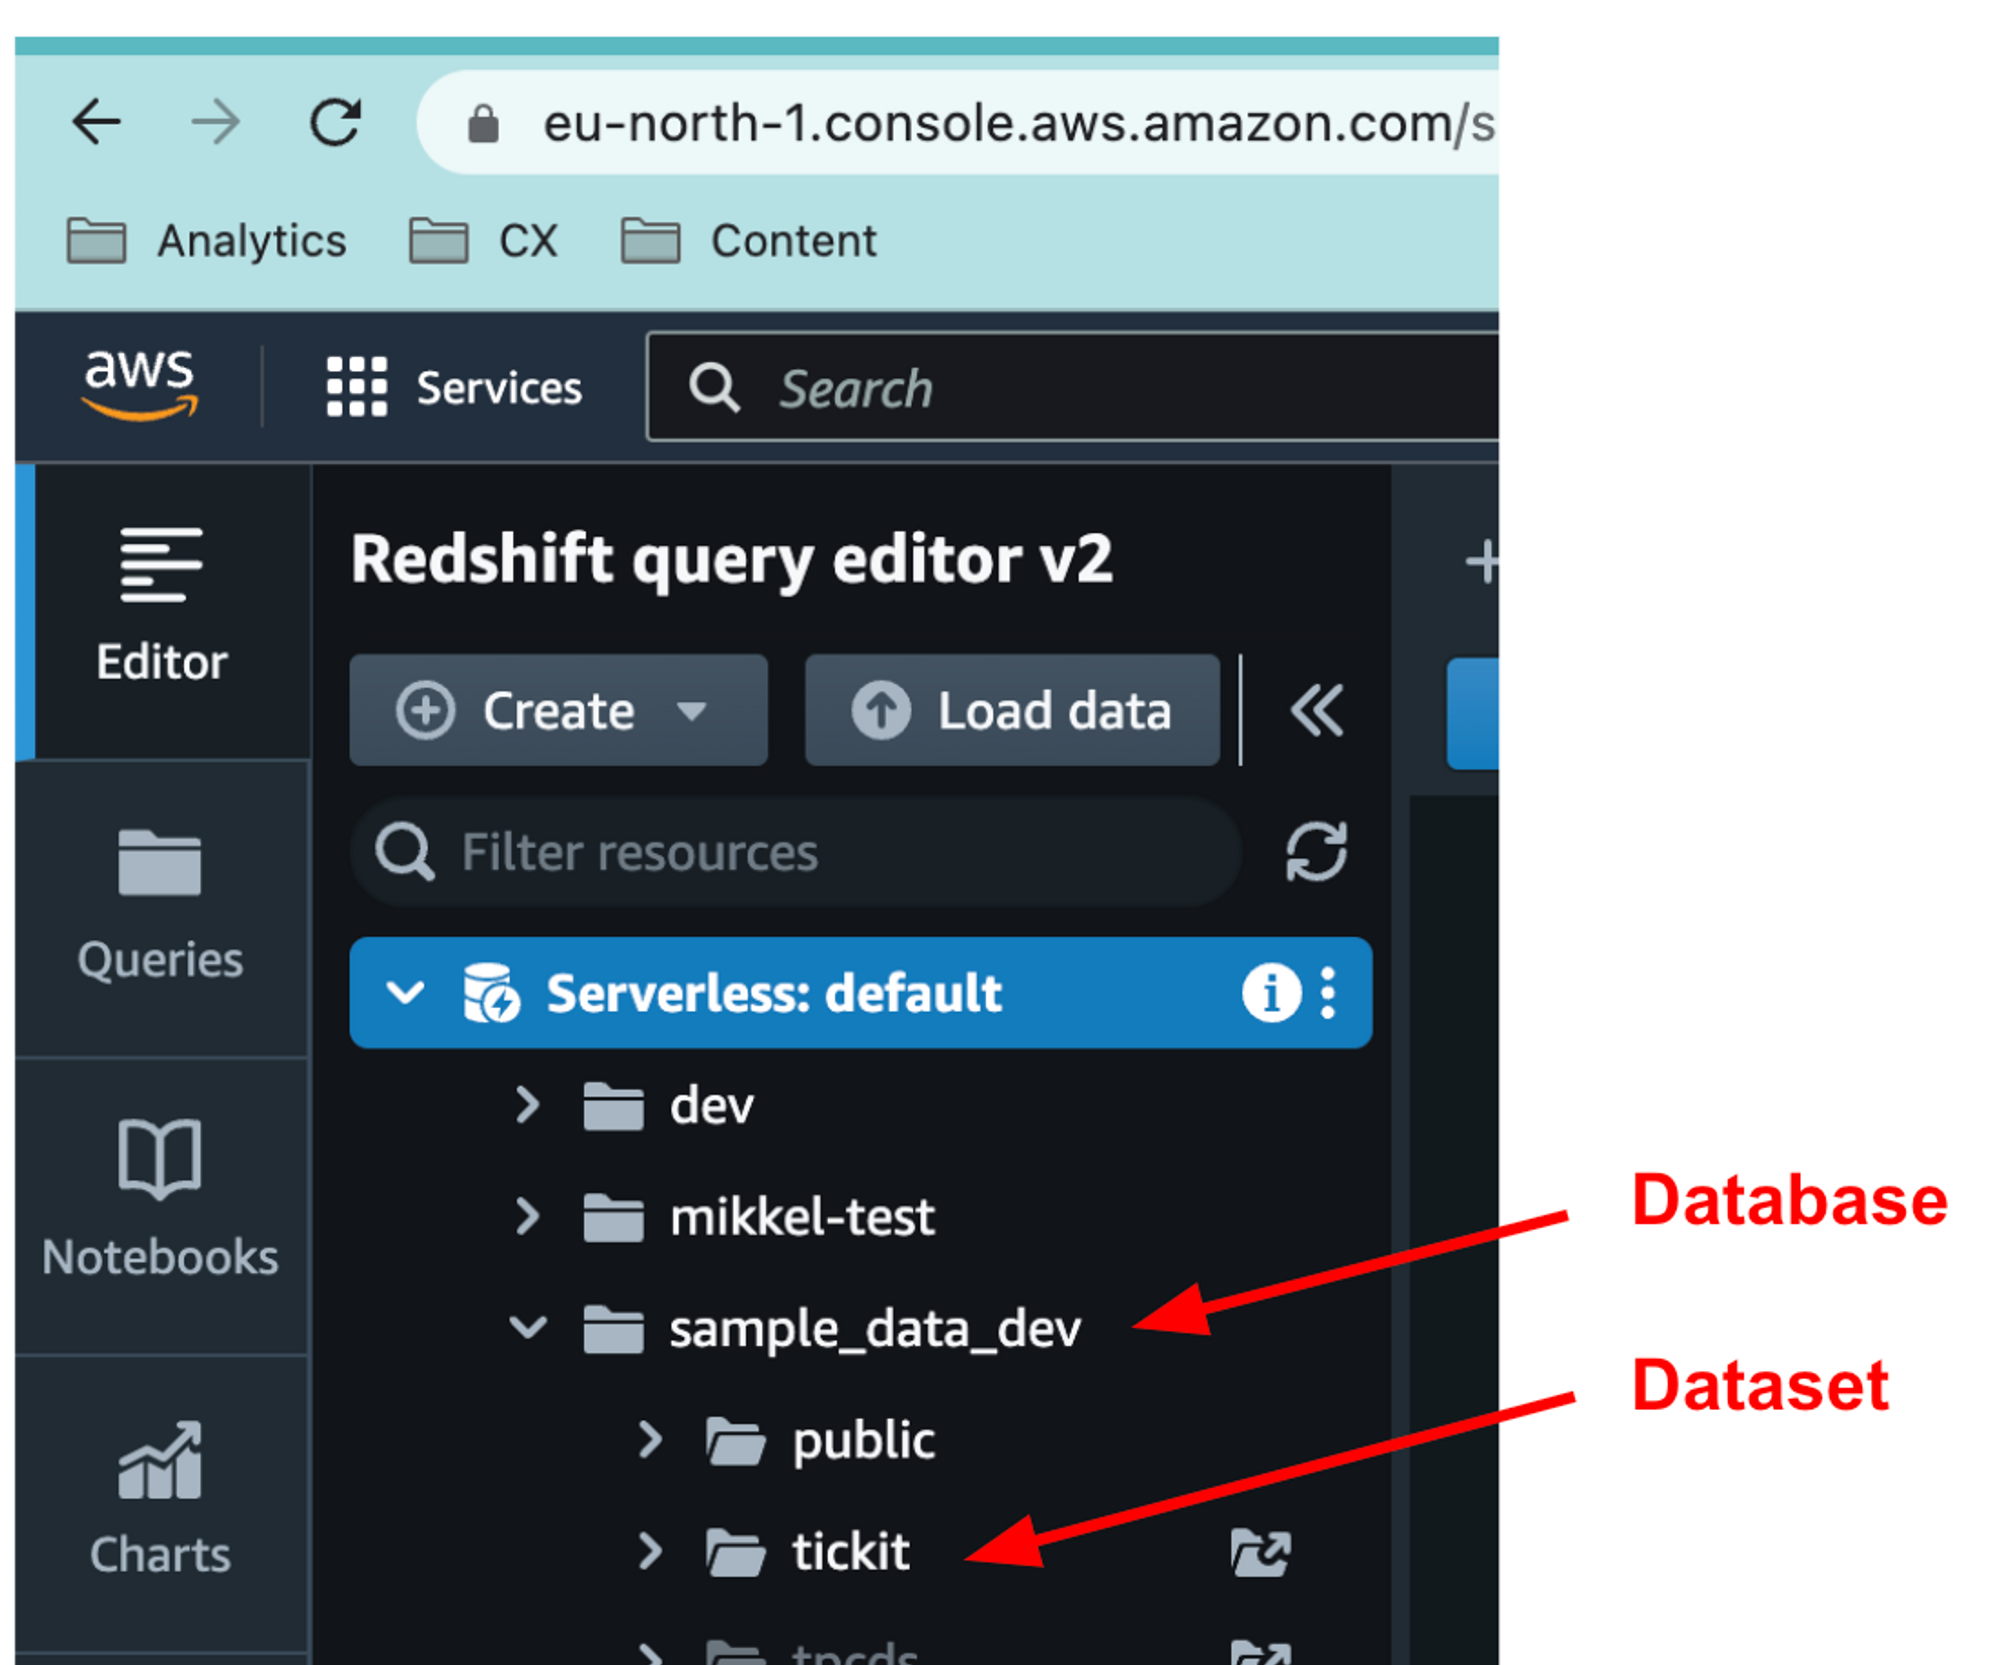
-
Take a note of your database name. It can be found in the Query Editor.
-
Go to
Workgroup configurationand select your workgroup. Take a note of yourJDBC URL.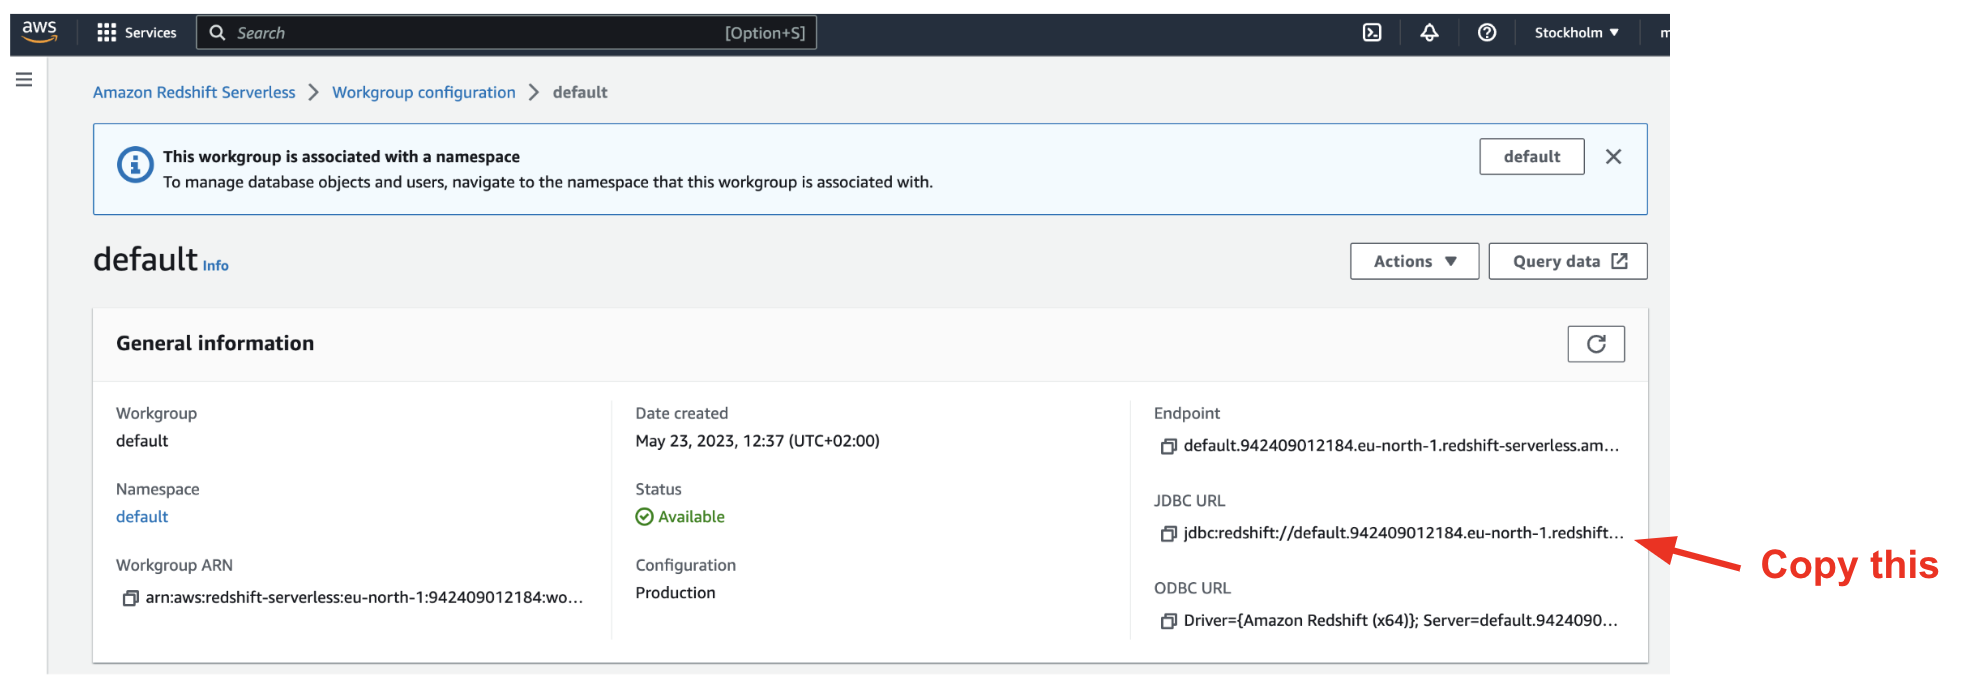
Input data in the Coalesce Quality UI
Integration name
For exampleRedshift.
Database
The name of your database (e.g.analytics_prod).
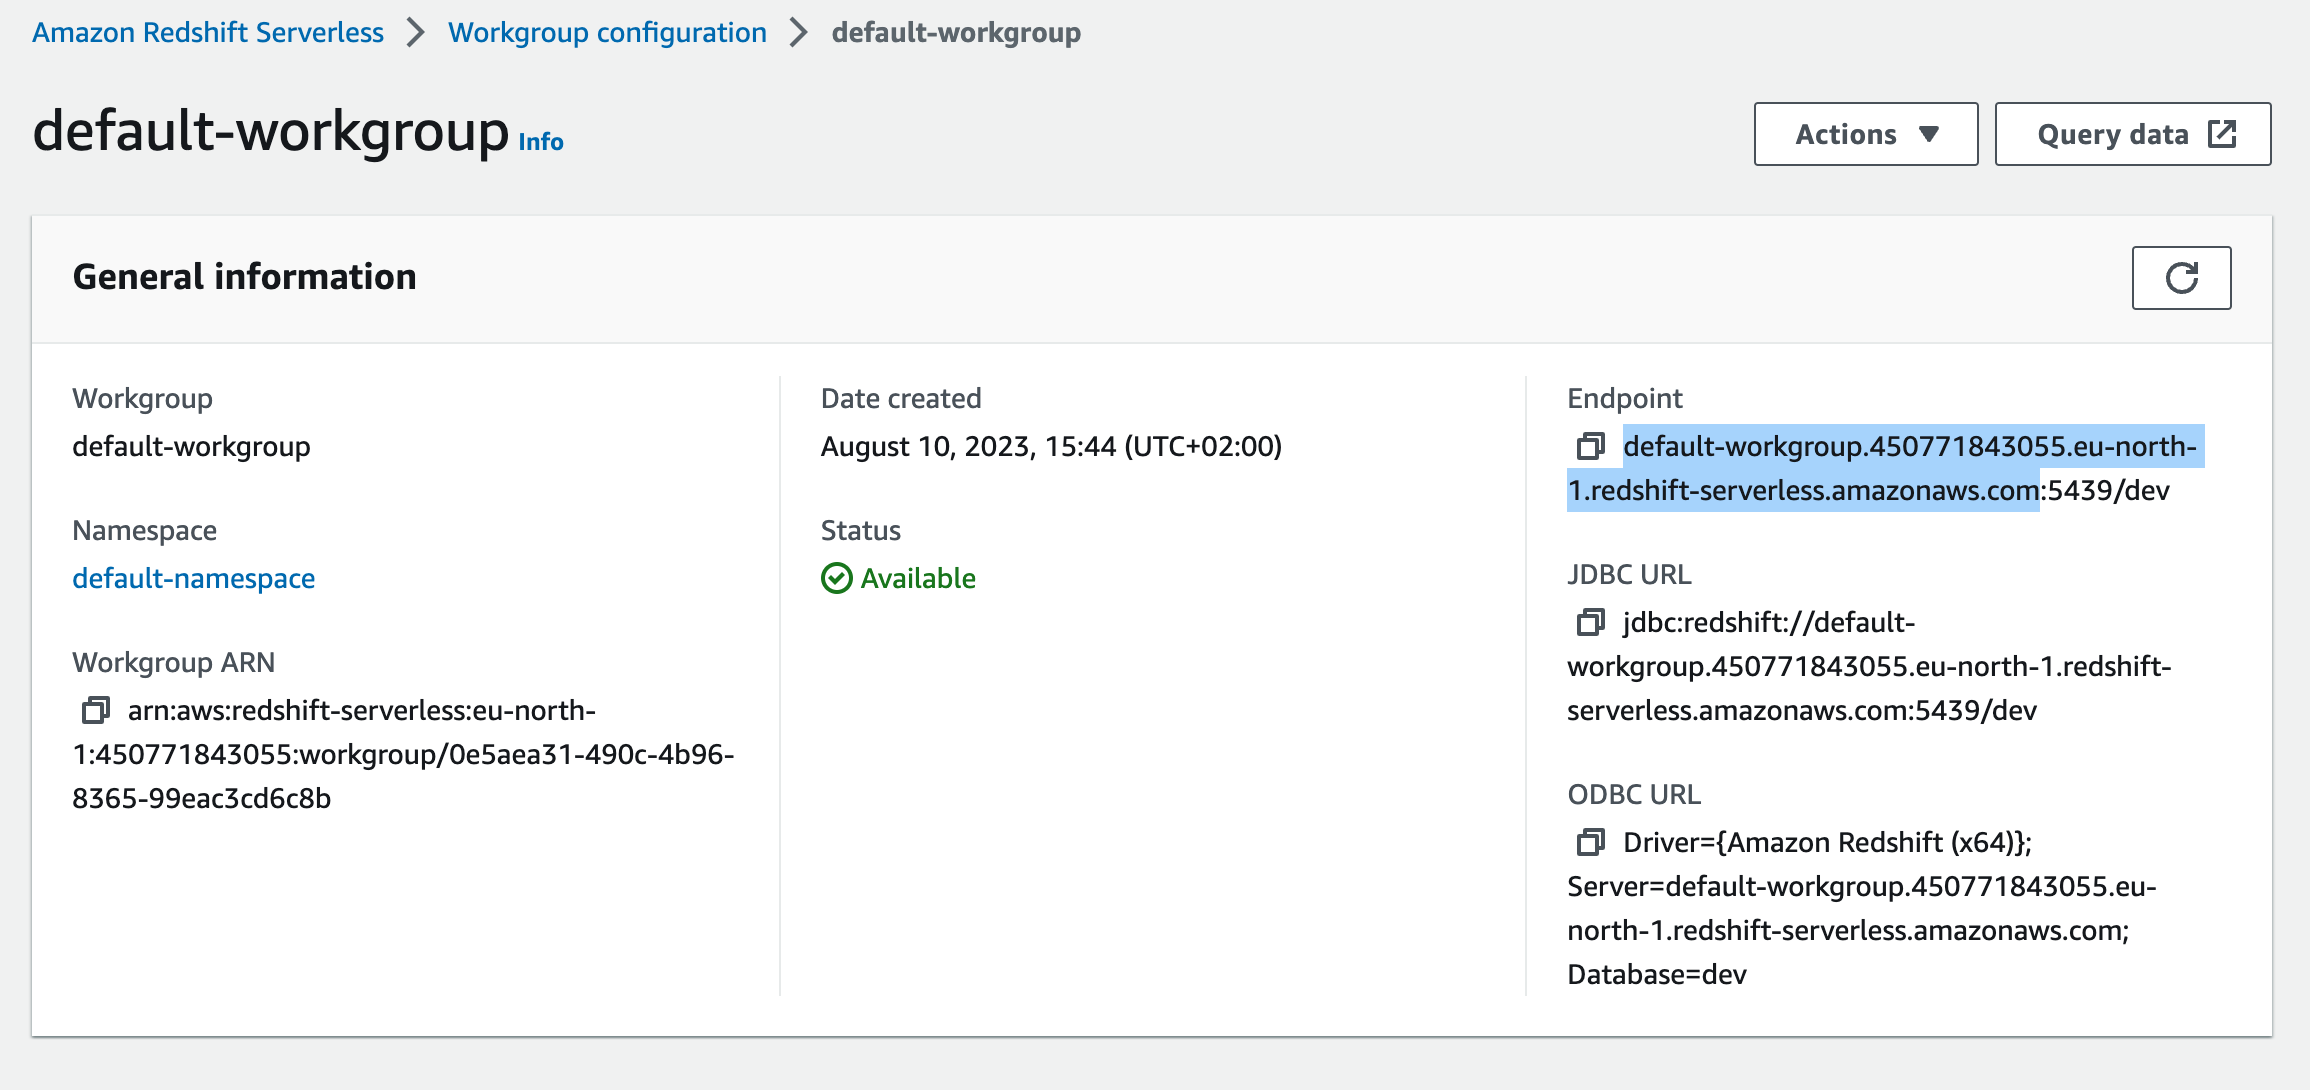
Host
The hostname of your workgroup endpoint (e.g.my-workgroup.123456789012.eu-central-1.redshift-serverless.amazonaws.com or my-cluster.us-east-1.redshift.amazonaws.com).
To find the host: open Workgroup configuration, copy the Endpoint, and strip the trailing :5439/<dbname> part.
Port
Default is5439.
User and password
synq_user and the password you set in step 2 above.
Audit table name (optional)
Fully qualified name (schema.table) of the table where Coalesce Quality should write SQL test audit logs — for example analytics.synq_sql_test__audit. Coalesce Quality creates the table if it does not exist. Leave empty if you only run metadata monitors and don’t execute custom SQL tests against the warehouse.
SSH Tunnel (optional)
If your Redshift workgroup is private and only reachable through a bastion host, clickAdd SSH tunnel and fill in the bastion details. Leave this empty for clusters reachable via the public endpoint (the standard setup described above).
Data collection options
Two opt-in checkboxes control what beyond catalog metadata Coalesce Quality reads:- Fetch query logs (Recommended) — pulls from
SYS_QUERY_HISTORY. Required for proactive anomaly-monitor training, unused-table detection, and cost insights. Adds a small recurring query cost — typically a few dollars per month on Serverless. - Estimate freshness of tables from
SYS_QUERY_DETAILview — derives a per-table last-modified timestamp from query history. Requires thesys:monitorrole on Serverless (see Enable freshness monitoring above).
In some cases, permission grants can take a while to propagate. If you keep getting a
Connect failed error after double-checking your details, try again after a minute.